Creating users
You will need set up any missing users in the Supplier Portal of P2i so that they can manage your Organisation's ongoing service responsibilities with the Queensland Government.
You will need to use your P2i Pre-Launch User Setup Tool where you have previously identified missing users and create them in P2i by following the steps below.
There are four types of users that require setting up in P2i:
Service outlet data entry - Day to day activities that involve periodic data entry for performance based acquittals, and attaching milestone reports when necessary.
Supplier budget and finance - Recording of unspent funds for performance based acquittals, report financial acquittal statements and reporting audited financial statements.
Service outlet manager - Endorse periodic performance data.
Supplier organisation director - Approver role for performance data and financial acquittal statements.
To create a user:
-
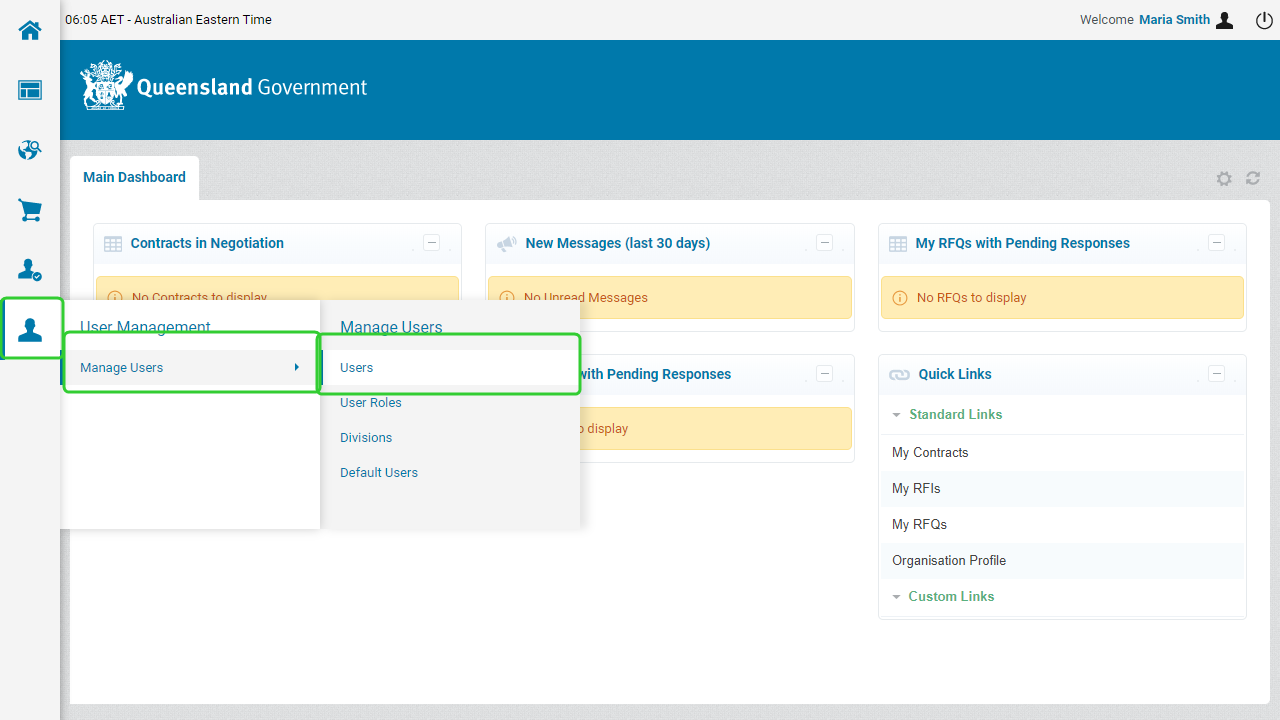
Click the User Management menu item, select Manager Users and then click Users.
-
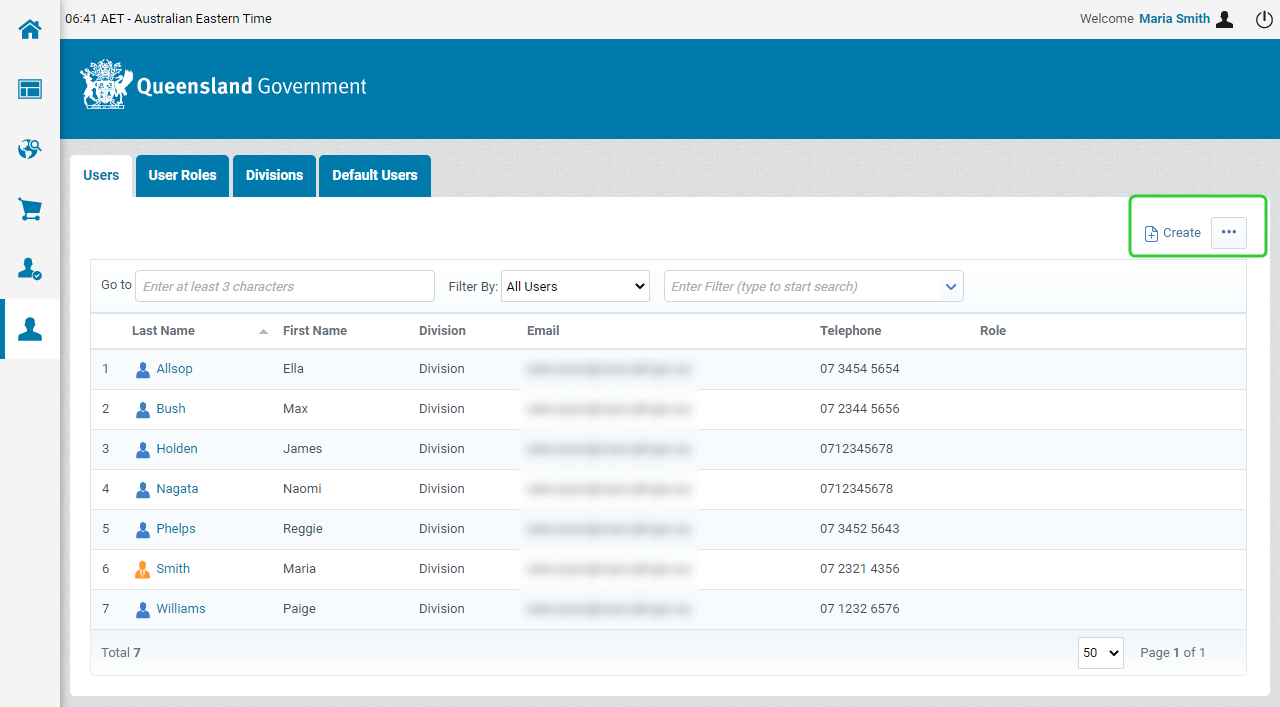
Click Create to add a new user to the Supplier Portal or Supplier Contract Management Portal.
-
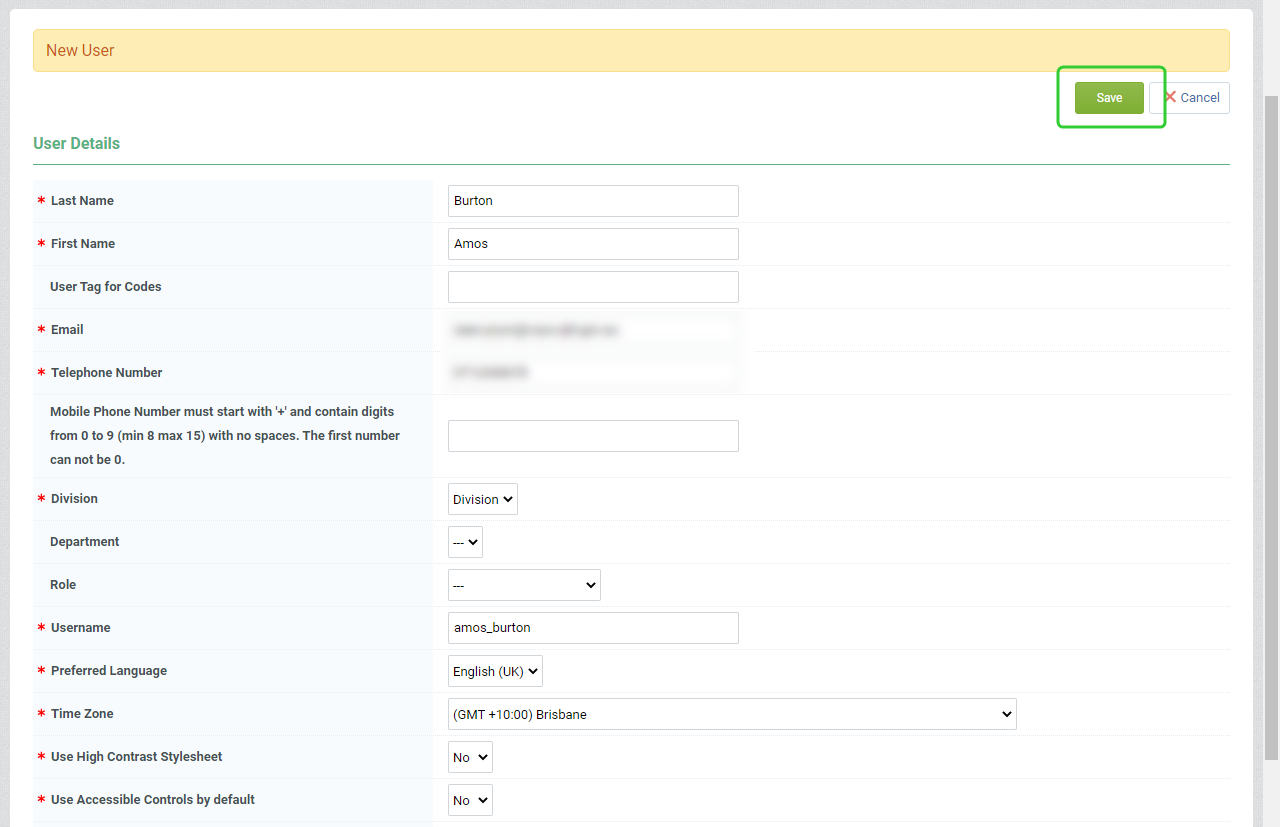
Enter the new users' details and click Save.
Tip: To add new user roles to the Role Names field, refer to the Creating user roles topic. -
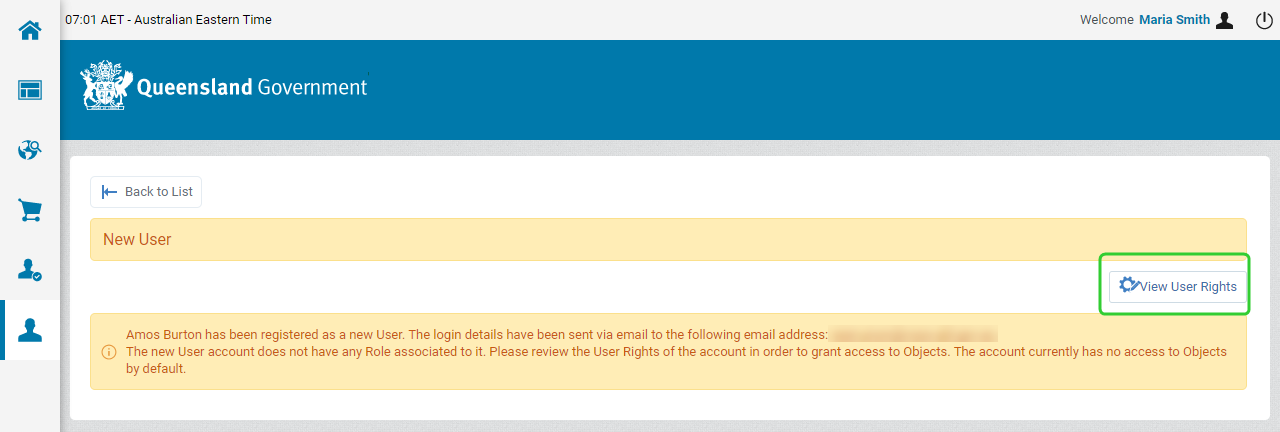
Click View User Rights to display the User Rights for the new user.
-
Click Edit to switch to edit mode and modify all User Rights.
Tip: You can edit rights for each part of the Supplier Portal (RFx, Contract Management, Supplier Management, User Management, and the P2i Help Centre) and for the P2i Downstream Navigation Access (which provides access to the Supplier Contract Management Portal for submitting Acquittals). The Acquittals Dashboard link is accessed by clicking .Note: You will need to set Access Supplier Management to Yes for any users that are being set up with the Supplier budget and finance role so that they can upload Annual Financial Statements at the Organisation level.
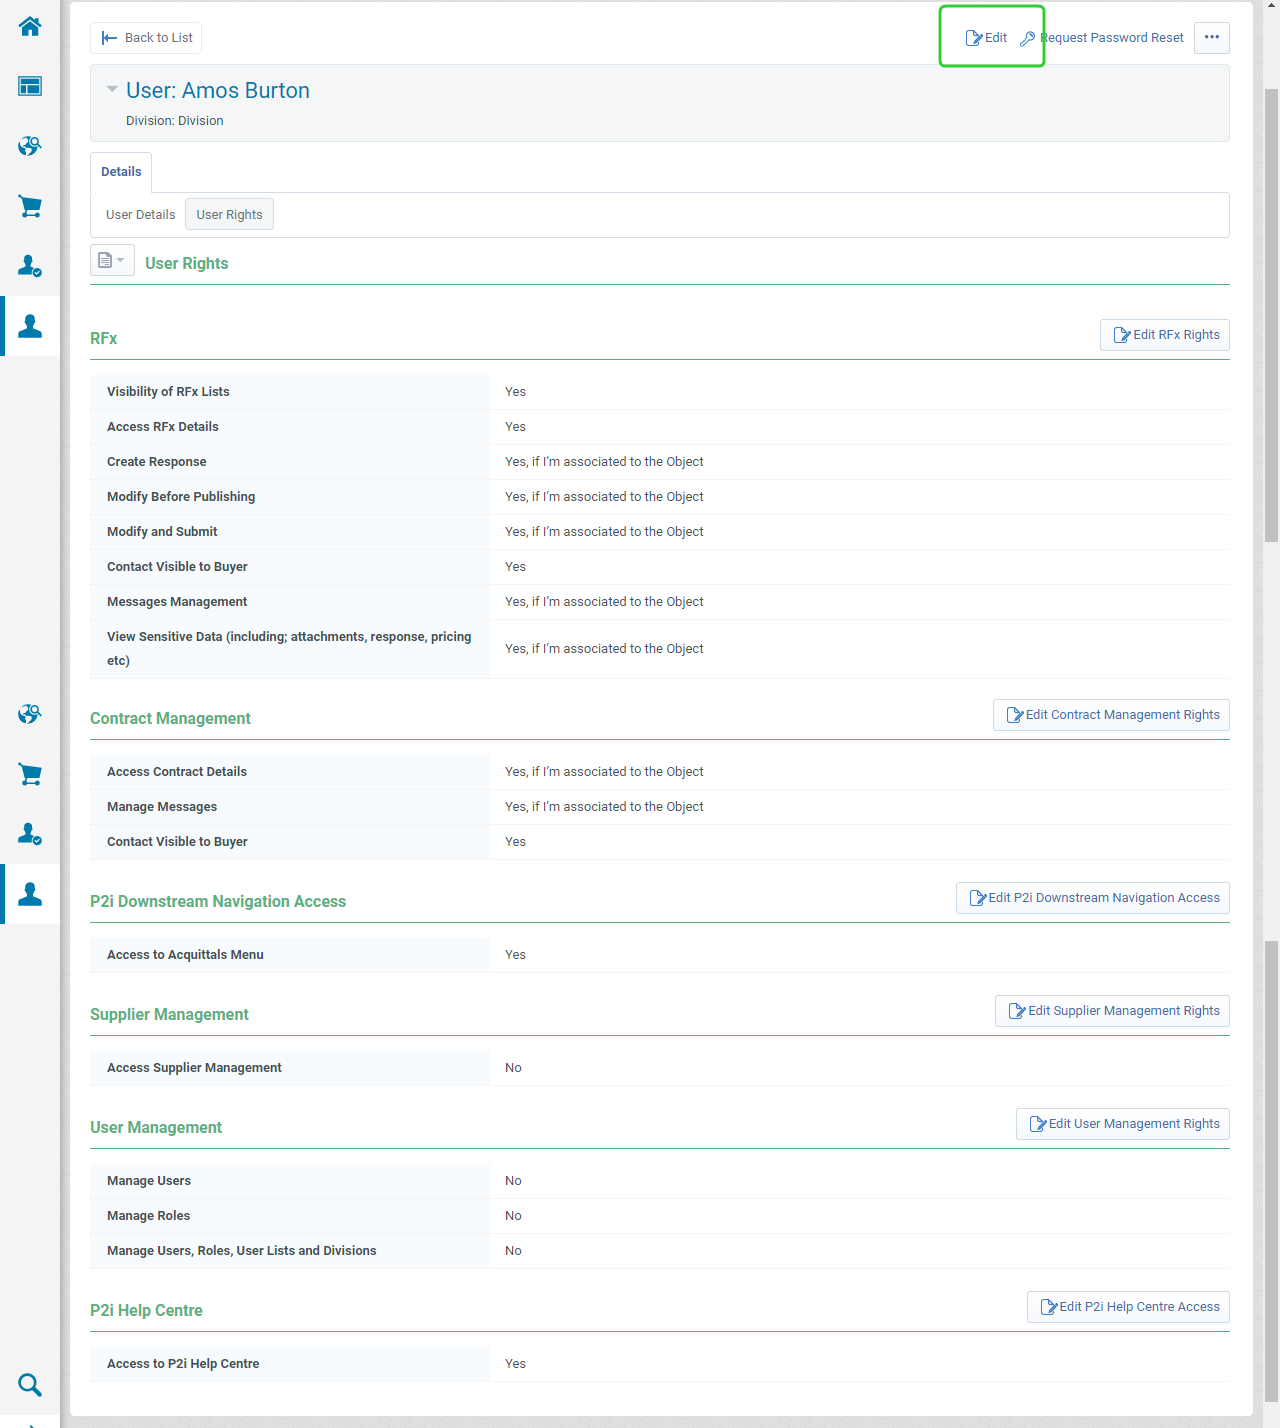
-
You can also use the Table of Contents menu to jump to specific modules where you can edit the User Rights.
Tip: This is useful if you only want to edit User Rights for all RFx or specific RFx (RFx refers to both RFIs and RFQs)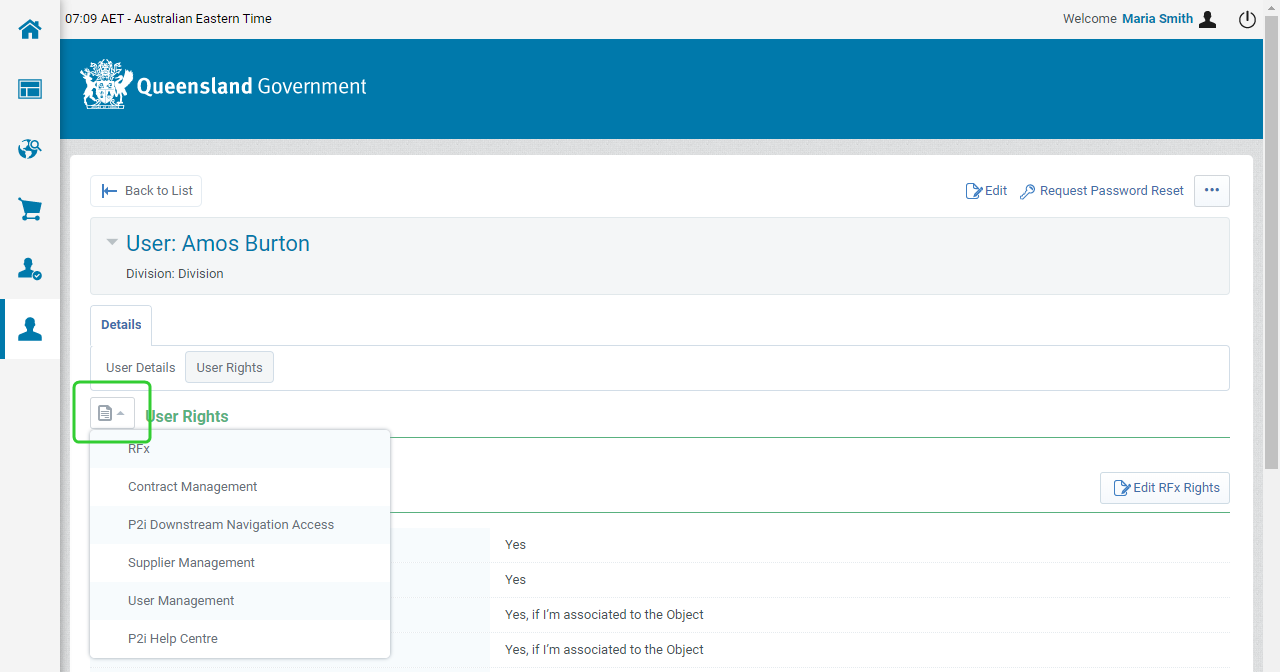
-
Set the User Rights for each action and click Save.
Note: There are three access levels for each activity:
• No (No access at all)
• Yes, if I am associated to the Object. (Access is provided if the user is associated with the specific RFx and/or Contract.)
• Yes (Access to all activities.)
Set Full Rights - Sets all levels to Yes and provides the user with the same rights as the Supplier Admin (Super User).
Set Minimum Rights - Sets all levels to No and provides the user with visibility of the Main Dashboard.It is recommended that you refer to the table below when setting user rights for new or existing P2i users:
P2i User Rights Table
Section Rights Recommended Values Org Director and Administrator Involved in responding to RFx Involved in Contract Management RFx Visibiity of RFx Lists Yes
Yes Yes (if also involved in RFx) Access RFx Details Yes Yes Yes (if also involved in RFx) Create Response Yes "Yes or Yes, If I'm associated to the object" "Yes or Yes, If I'm associated to the object (if also involved in RFx)" Modify Before Publishing Yes "Yes or Yes, If I'm associated to the object" "Yes or Yes, If I'm associated to the object (if also involved in RFx)" Modify and Submit Yes "Yes or Yes, If I'm associated to the object" "Yes or Yes, If I'm associated to the object (if also involved in RFx)" Contact Visible to Buyer Yes Yes Yes (if also involved in RFx) Messages Management Yes "Yes or Yes, If I'm associated to the object" "Yes or Yes, If I'm associated to the object (if also involved in RFx)" View Sensitive Data Yes "Yes or Yes, If I'm associated to the object" "Yes or Yes, If I'm associated to the object (if also involved in RFx)" Contract Management Access Contract Details Yes "Yes or Yes, If I'm associated to the object (if also involved in Contract Management" "Yes or Yes, If I'm associated to the object" Manage Messages Yes "Yes or Yes, If I'm associated to the object (if also involved in Contract Management" "Yes or Yes, If I'm associated to the object" Contact Visible to Buyer Yes Yes (if also involved in Contract Management) Yes P2i Downstream Navigation Access Access to Acquittals Menu Yes Yes (if also involved in acquittals or payments) Yes (if also involved in acquittals or payments) Supplier Management Access Supplier Management Yes Yes (if the user is required to view or update your organisation profile or view or upload attachments) Yes (if the user is required to view or update your organisation profile or view or upload attachments) User Management Manage Users Yes (if also assisting System Administrator) Yes (if also assisting System Administrator) Yes (if also assisting System Administrator) Manage Roles Yes (if also assisting System Administrator) Yes (if also assisting System Administrator) Yes (if also assisting System Administrator) Access to P2i Help Centre Access to P2i Help Centre Yes Yes Yes (if also assisting System Administrator) 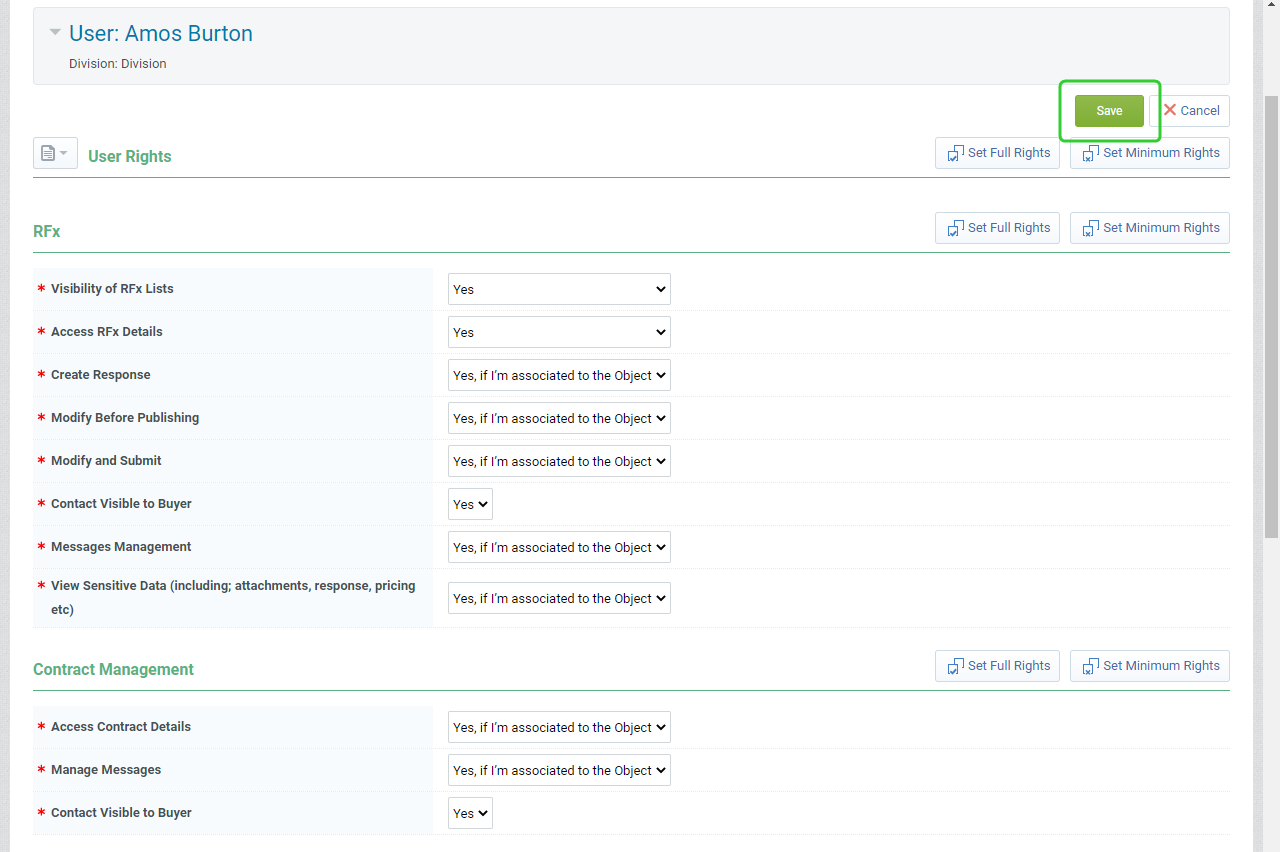
-
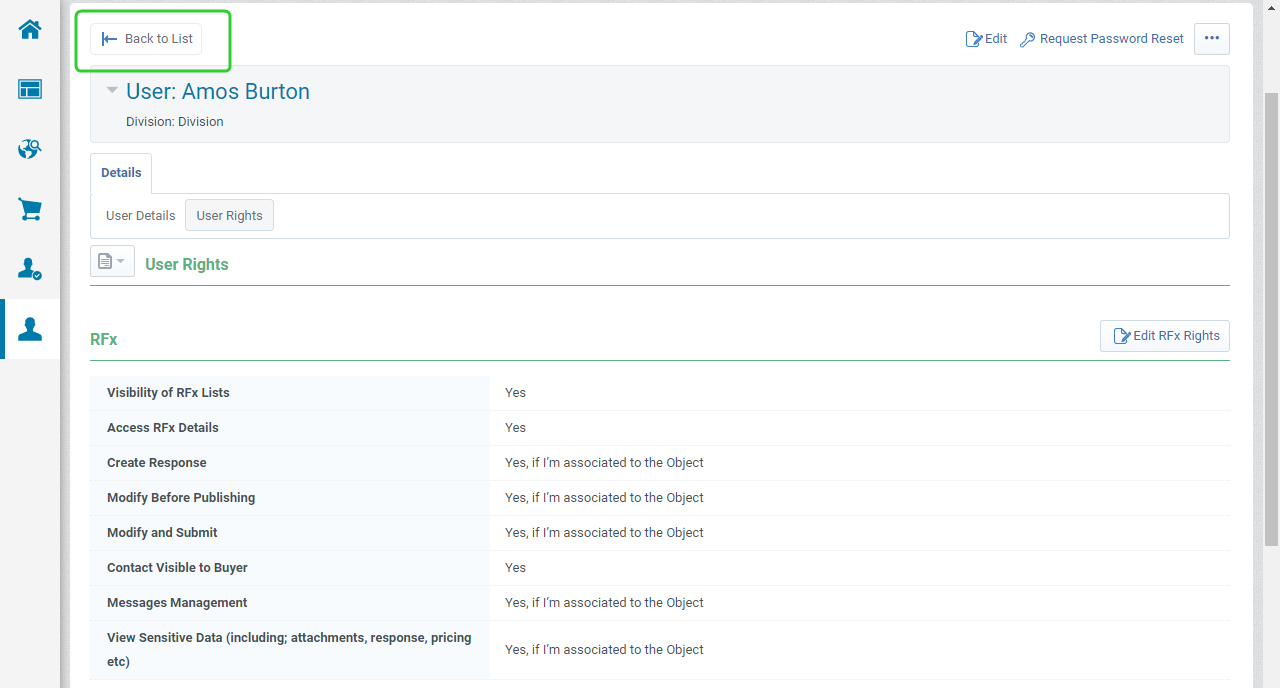
Click the Back to List to return to the Users screen.
-
Check your existing migrated users and repeat Steps 4 to 8 to check and update their user rights or deactivate anyone that shouldn't be there.
Warning!: Migrated Org Directors will have their access to the Acquittals Menu removed. This must be checked and updated to Yes for all Org Directors.